
At this point, every kid has made slime. They probably have a ton of basic slime at home. If you’re going to throw a slime party for the masses, you need to make it special! Impress kids and shatter their expectations of the library by researching the trendiest slime, and making it happen.
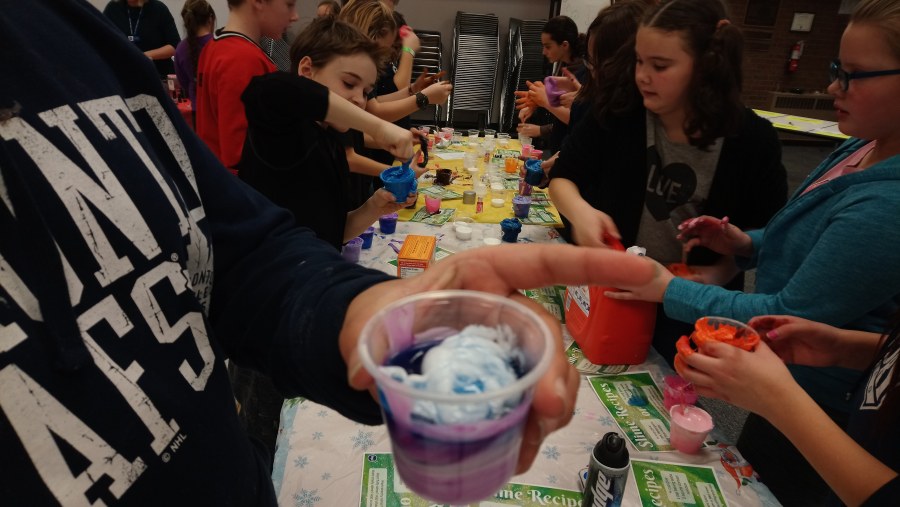
One easy way to do this is by including a bunch of add-in options. I had two “Slime Base” tables were kids could create their basic stretchy, gooey slime. When they were ready they could take their slime and explore 5 other tables: the Add In Table, the Play With Your Slime Table, the Contest Table, Decoration Table, and the Oobleck Table.


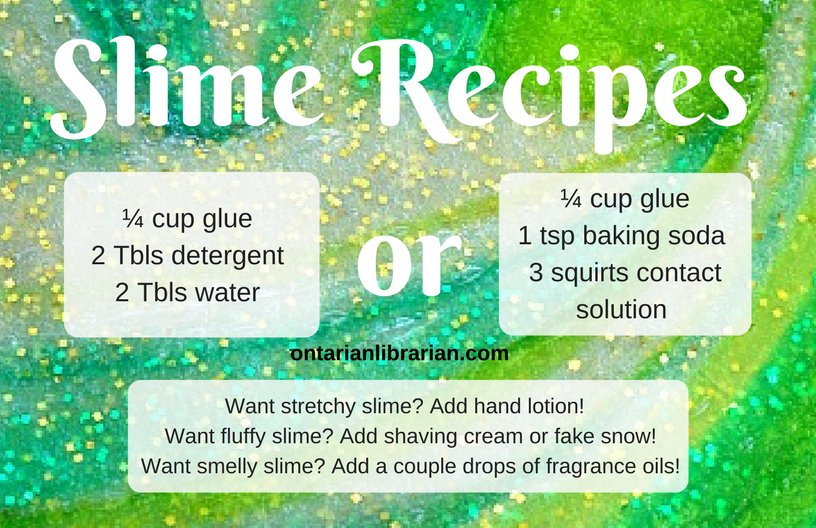
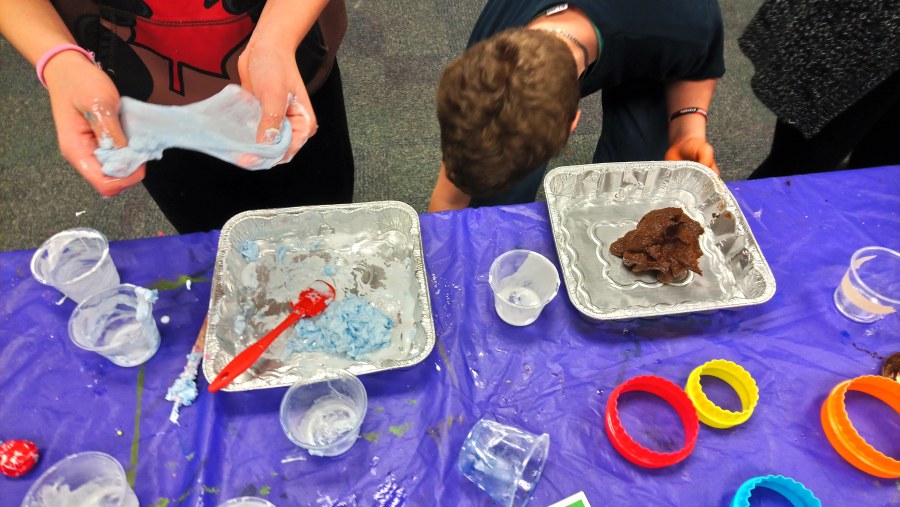
The Slime Base Tables
Having two different base options added a layer of excitement and discovery right away. I had about 100 glue cups ready, and 40 attendees, so I let everyone make 2 kinds of slime.
Materials Needed for Slime Base Table:
- School Glue
- Plastic containers with lids
- Popsicle sticks
- Plastic table cloths
- Food colouring
- Tide detergent
- Water bottles
- Baking soda
- Contact Solution
At one table I had a huge container of Tide detergent, 50 plastic cups half filled with white Elmer’s glue, water bottles, and food colouring.
The other table had 50 plastic cups half filled with white glue, one box of baking soda, 2 bottles of contact solution, and food colouring.
Both tables had recipe cards (see above), plastic table cloths, and Popsicle sticks.
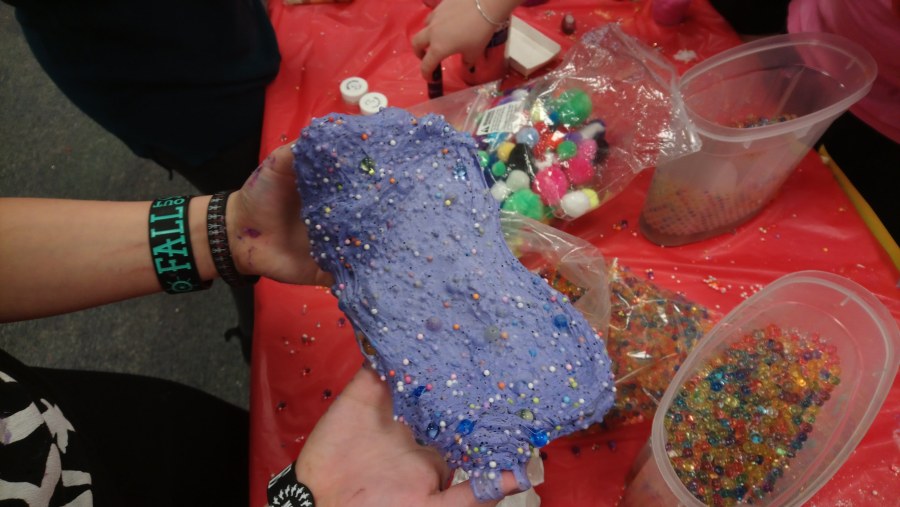
The Add-In Table
After kids had the consistency they wanted, they could come to the Add In table to switch things up. Here are the options I had:
- glow in the dark powder
- glitter
- fake snow (this is very trendy and can be hard for kids to get a hold of. I bought mine from Amazon)
- tiny foam balls
- shaving cream (makes slime fluffy)
- hand lotion (makes slime stretchier)
- sequins
- pom-poms
- flour
- fragrance oils
- baby oil
- water beads
Since running this party, the newest trend seems to be adding air dry clay to your slime. This makes it smooth and buttery.
You definitely need a volunteer or coworker to oversee this table. You might want to limit everyone to 3 add-ins per slime.
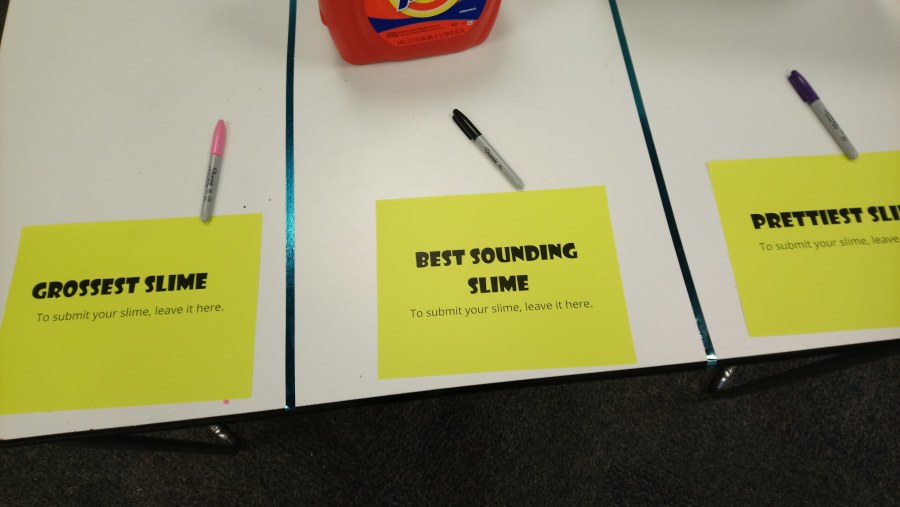
The Contest Table
I had 3 categories: Prettiest Slime, Grossest Slime, and Best Sounding Slime. Kids could submit one of their slimes to one category. Near the end I tested out every slime in front of the crowd, and awarded the winners a prize…of store bought slime. It was really neat to see what they came up with! I regret having touched some of the “grossest slime” entries though.
I included the Best Sounding Slime after watching a few viral slime Youtube videos. How a slime sounds is actually a major criteria to some kids! You can hear a slime by squishing it, poking it, or smacking it. I found that the detergent-based slimes was the best sounding because it had tiny air bubbles throughout.
The Play With Your Slime Table
I set up a table with 6 tin pie plates and a variety of tools (cookie cutters, strainer, tongs, etc). Kids could take their completed slime over there and test it out / compare it to other people’s slime.

The Decorate Your Slime Container Table
Washi tape, rhinestone stickers, labels, and markers. It’s that simple, and very effective.

The Oobleck Table
I made a huge tub of plain oobleck (equal parts water and corn starch). Kids could play with it, add stuff to it, or add it to their slime. So many kids loved it that I ended up splitting it up into plastic containers and giving it away as they left.

Why Slime?
Slime and libraries are actually a wonderful pairing. I think of libraries as educational playgrounds that should accurately reflect their community’s interests. When serving the part of your community between the ages of 7 and 13, a major interest is definitely slime. I always try to create a play-based and inquiry-based learning environment (even if the program is about pizza or slime).
This program engages and excites kids, gets them playing with science, and lets them create their own custom recipe. The Play table encourages kids to compare slimes, and make new friends. The Contest encourages them to meet a set of criteria creatively, in a fun and low-pressure way.
What are your favourite slime activities?

This is awesome, thank you for sharing it!
Amazing! Can’t wait to incorporate some of your ideas at the Powassan & District Union Public Library!
This is amazing! Thank you so much for sharing. I’ll be running a slime program this summer at my library, and wasn’t sure how to make it a group event. You’ve given me so many great tips and ideas. Thanks!
[…] School-Age Storytime. You might be all slimed out but Karissa the Ontarian Librarian shares some brilliant new stations for a slime program and also why libraries are the perfect place for slime. Finally, if you’ve been itching to try an […]
This looks awesome. What size plastic containers did you use?
Thanks! I usually use 4oz or 6oz containers with lids. Plastic ziplock baggies work in a pinch.
[…] How To Throw a Slime Party at the Library (and why you should!) […]
[…] How To Throw a Slime Party at the Library (and why you should!) […]
how much time did the actual program take?
One hour.