
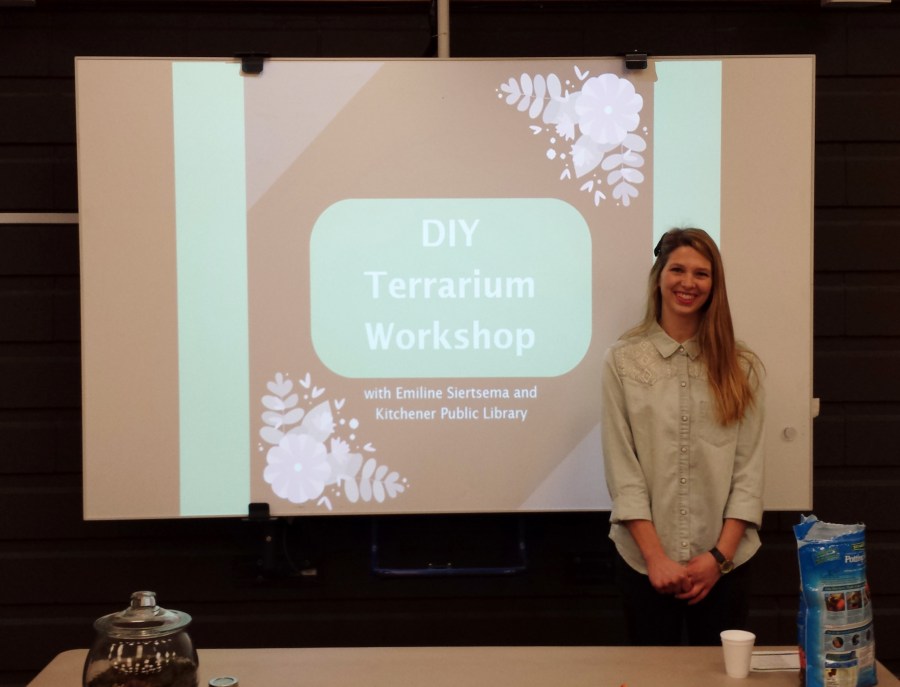
Turns out terrariums and the library are a great mix! I’ve run this DIY Terrarium workshop twice at the Forest Heights Branch of Kitchener Public Library, and both times it’s been full (20 attendees) with a wait list! I’m lucky to have a good friend and terrarium guru, Emiline Siertsema (pictured adorably above) who has come in both times to instruct the hour long program. But with the right know-how and resources librarians can run this workshop themselves. And it can be done for less than $40 for 20 people.
Materials needed:
- Mason Jars or and small glass container (24 for $17 from Walmart, or $1 each from the dollar store, or attendees bring their own)
- small rocks (harvested from the beach if possible or from the dollar or craft store)
- dry moss (One large bag costs $6-15 at most garden supply stores, but I’ve also seen some at big dollar stores)
- potting soil (one small bag will last several sessions, and costs about $5 at garden supply stores)
- live moss (harvested from the forest with roots intact or purchased from garden supply store)
- Plastic coffee stir sticks (or any other long stick material for tamping moss into place)
- 2 plastic spoons for the potting soil bag
- Newspaper pages to cover tables with
- animal (and dinosaur) plastic figurines (8 for $1 from the dollar store)
- Optional: blue glass stones to look like watering holes (dollar store)


Room Setup:
- We arranged the participants tables in a U shape to seat 20 people.
- The demonstrator’s table was at the front of the room (closing off the empty portion of the U shape into a square) in front of a projector screen.
- Every table was covered with sheets of newspaper
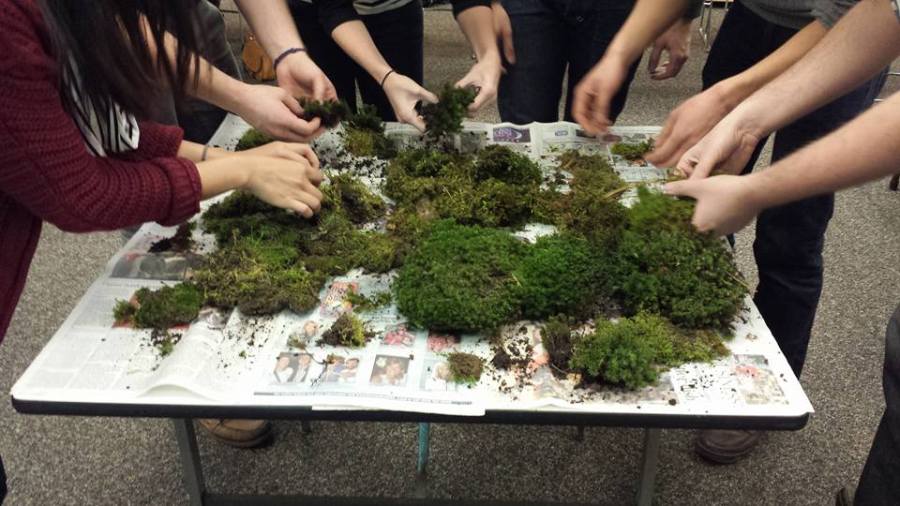
- In the centre empty space of the room we set up a small square table with all the different types of live moss
- A jar was placed in front of each seat. A small pile of pebbles and a chunk of dried moss was placed between each two seats.
- The dried moss was pre-moistened a few minutes before the event with a few dabs of water to each chunk.
- The bag of potting soil and 2 plastic spoons were passed around the room when needed
- The figurines and small blue glass “watering holes” were arranged on the demonstrators table
- I always like to set up a powerpoint presentation to cycle through during my adult programs – one title slide with the name of the program and presenter, and 3-4 other slides advertising similar upcoming programs.
- We printed out Step-by-step Instructions for attendees to take home.
- If you have enough books on terrarium making you could set up a display.
- Find a clean, relaxing playlist and you’re good to go!

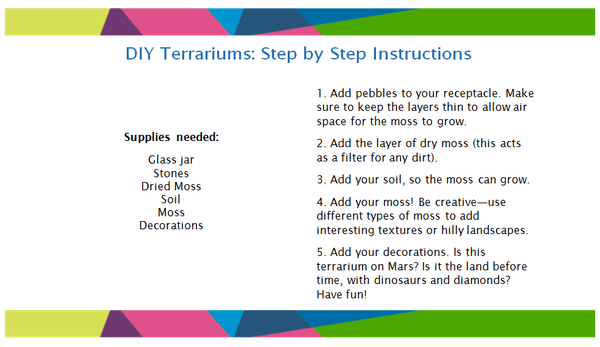
Step-By-Step Instructions:
- Add a thin layer of rocks to the bottom of your jar. If you’d like to create a small hill, pile the rocks accordingly.
- Take a thin layer of dried moss – no thicker than the height of your pinky finger nail, and pull and flatten it out to fit the base of your jar. The moss should be slightly moistened at this point. You can spray or dribble more water on the moss if you’re finding it difficult to manipulate
- The layer of dried moss acts as a filtration system for your terrarium – you don’t want to see dirty water seeping down to the bottom of your jar. This layer acts as a barrier between the soil and the rocks.
- Place the dried moss into the jar. Use your coffee stir stick to press the moss firmly on top of the layer of rocks. You want the moss to mold nicely into place.
- Spoon a layer of potting soil on top of the dried moss. This layer can be as thick as you’d like. It’s added here to give the live moss something to latch onto and survive off of. Some people like the look of a thin layer, others like a thick hilly layer. Just beware to leave a significant amount of air space for the live moss to grow.
- Add your live moss. This is where things get really creative. You can mix and match different types of moss to create a unique terrain – some mosses look like ferns, some look like grass, some can even look like mini trees! Have fun with it. The cool thing is that these mosses might grow and sprout new tendrils as time passes. Try to cover the entire layer with moss.
- Now choose and add your figurines!


Terrarium Care:
- If the jar becomes foggy with moisture, take the lid off. This is a common problem – especially during the first week of the terrarium. If the lid is left on for too many days and moisture is allowed to remain, the terrarium may become moldy. Sometimes removing the lid for a few days will kill the mold.
- If the live moss becomes dry, water sparsely using a spray bottle. Do not pour water directly into the terrarium.
- If dirty water begins to collect at the bottom of the terrarium, there are two potential causes: you are watering it too much or the filtration system isn’t working properly. Try watering it less often, or adding a thicker layer of dried moss.
Summary:
We’ve run this program twice now, and both times it has had a significant wait-list above the 20 attendees – a major library success!
In terms of demographics, most of the attendees were women between the ages of 20 and 50. However, both times we had a few grade-school-aged children and teen attendees, and the second time we had 5 guys in their 20s show up. Every demographic was grateful and happy with their finished product.
The feedback I’ve received from attendees has been extremely positive – many found it a relaxing and creative experience. I asked some where they would put their finished terrarium and many mentioned that they’d put it on their desk “for inspiration and calm.” This event also drew new patrons into the library, some of which decided to sign up for library cards.
Downloadable Resources:
- Take-home instruction sheets made by Emiline Siertsema:
- DIY Terrarium Workshop title image made using Canva.com:
- Downloadable PDF: Terrarium Workshop Outline
Slide Show:
If you have any questions feel free to leave a comment, or contact me through the feedback form. Let me know how it works for you! Have fun!

Thank you for this! I love terrariums and I think our patrons will too.
[…] for fun ways to engage 20/30s at your library? I’ve created program outlines for DIY Terrarium Workshop, Books in the Park, Board Game Cafe, and Escape Room in the Library. Check out all my program […]
This is great, I’ve been looking for some inspiration for a terrarium program to do at my branch. How long do you allow for this program? Our patrons tend to attend programs in a more casual, drop-in style, so I’ll need to allow for time for that.
Whoops – I’m a dope, I see you have an hour-long program. Thanks for the inspiration!
[…] Source: karissamlis.wordpress.com […]
Any idea where you can get the live moss? I had to purchase succulents because I couldn’t find anywhere that had it for sale. Love this program idea!
Any idea where you can purchase live moss? I’ve tried quite a few nurseries and garden supply stores. I ended up purchasing succulents for my program. Thanks for this outline, it’s great!
Hey! I’m not sure where you can purchase live moss. The moss we used for this program was actually carefully harvested from a forest. Hope that helps 🙂
i’m doing this program tomorrow! I’m so excited! I purchased my moss through amazon (there are many options through etsy, too). There were several different sellers and mine seems to be doing okay so far.
I think I’ll try this program in April! It seems super fun, and nice for the spring. Thanks for posting this!
This program looks super fun. Im going to try it on Tuesday with my teens.
Have fun! Feel free to share the results with me on Twitter or Instagram! I’d love to see how they turn out.