
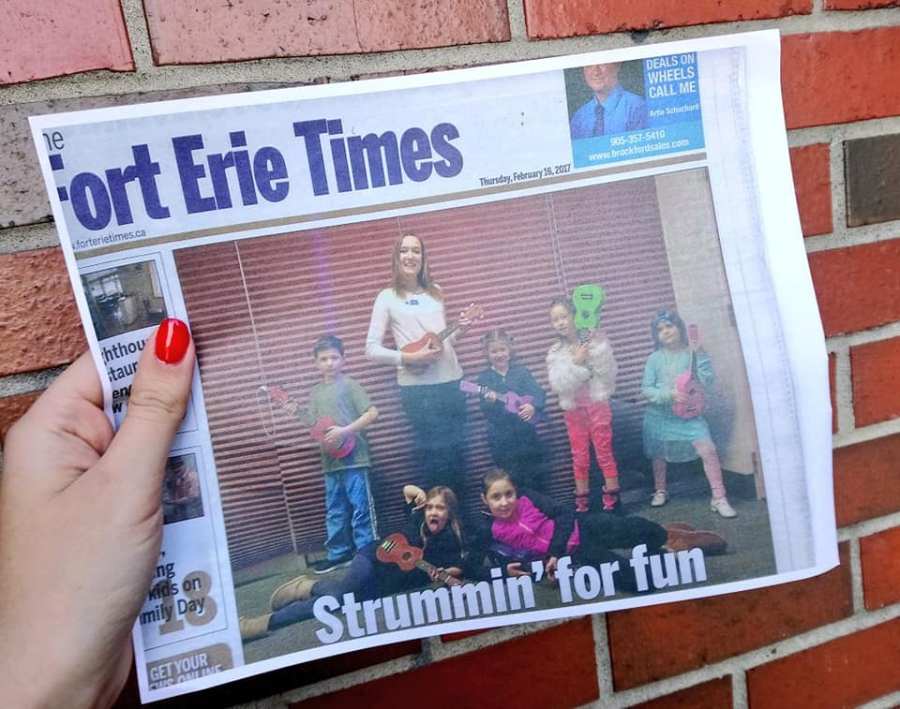
It’s small town front page news! Kids can learn how to play the ukulele at the library. Teaching ukulele skills is a fun way to engage children with music education – and it might even inspire a life long passion! Parents are so appreciative for a cheap and casual alternative to expensive and intense music lessons. And kids love developing new skills while having fun.
I do have a bit of a musical background – years of piano lessons and choir have taught me how to read music and play by ear. I taught myself the ukulele a few years ago, just for fun. However, the ukulele is truly easy to learn and most adults can pick it up quickly. I do recommend that before teaching this class, you make sure you’ve mastered the skills yourself. Or else, bring in a volunteer who can really play and have them demonstrate while you teach.

Details
10 kids
Aged 7 – 12
Registration Required
One hour
I run the ukulele program as a one off event for kids aged 7 – 12. We own 4 ukuleles and have 1 circulating ukulele, meaning that I can host 5 kids who don’t have ukes. I also open up 5 additional spots for kids who can bring their own ukulele. Often these are kids who just received them for a gift, or whose parents/older siblings have ukuleles. Here is the description that I use to promote the event:
“Kids aged 7-12 can try their hand at a new instrument – the ukulele! Together we will learn the basic chords and strumming patterns. ukuleles will be provided by the library, or you can bring your own. This workshop is intended for kids who have never played the ukulele before, or who have a small amount of experience.”
Learning Goals
Each time I teach this workshop, I start by getting a sense of where everyone is. Sometimes, everyone in the group already knows the basics, and we can spend the time developing the skills. But usually there’s a mixture of experience. Some kids don’t know how to hold the uke. Others can already switch between C and G chords. I explain that we are all going to develop our skills today – no matter what level we’re starting at.
My goals are to teach the following:
- Parts of a ukulele
- 3 different types of strumming
- Strumming Patterns
- How to read a chord chart
- Identifying the difference between major and minor chords by ear
- How to play a chord
- How to combine strumming and playing a chord
AND on the miraculous chance that we get through all of that in one hour and still have time:
8. How to switch between chords
Spoiler alert: We almost never learn to switch between chords.
After learning the first 7 skills, kids do have the basic knowledge and experience to start exploring the ukulele on their own. Switching between chords is by far the most difficult skill, and usually comes with time.
The anatomy of a ukulele
The first learning goal is the easiest! Yay! To make sure that everyone is on the same page, I make sure we are all using the same vocabulary to refer to the parts of the instrument: neck, frets, soundhole, and body are the most important parts. It is fun for some kids to learn the names for rest of the parts, so they start to feel like “experts.” I like this diagram from ukuleletricks.com:
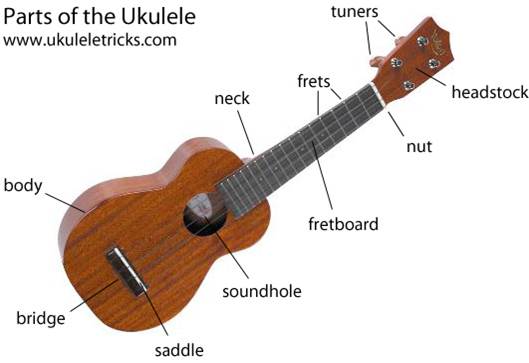
To assess their understanding I have everyone hold up their ukuleles and point to the parts as I name them.
3 different types of strumming
This is such a great way to get kids playing right away. I explain that there are 3 main strumming techniques and that everyone has their own preference. We spend 1 minute experiment with playing all of them, and kids pick their favourite. Then we go around the circle, and everyone demonstrates one strum with their chosen method. The methods are:
- Fingers
- Thumb
- Pick
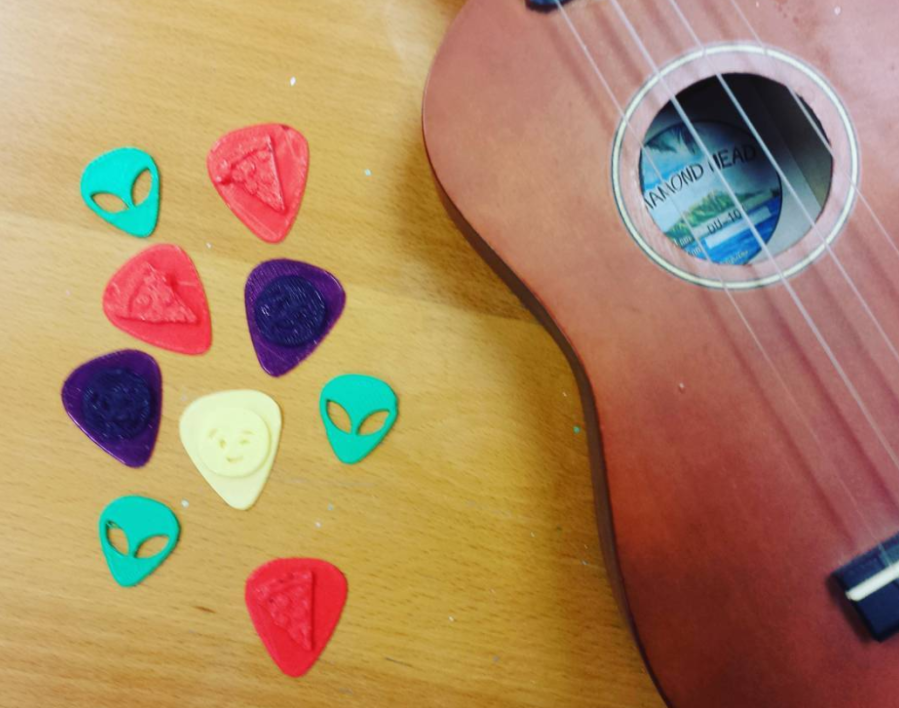
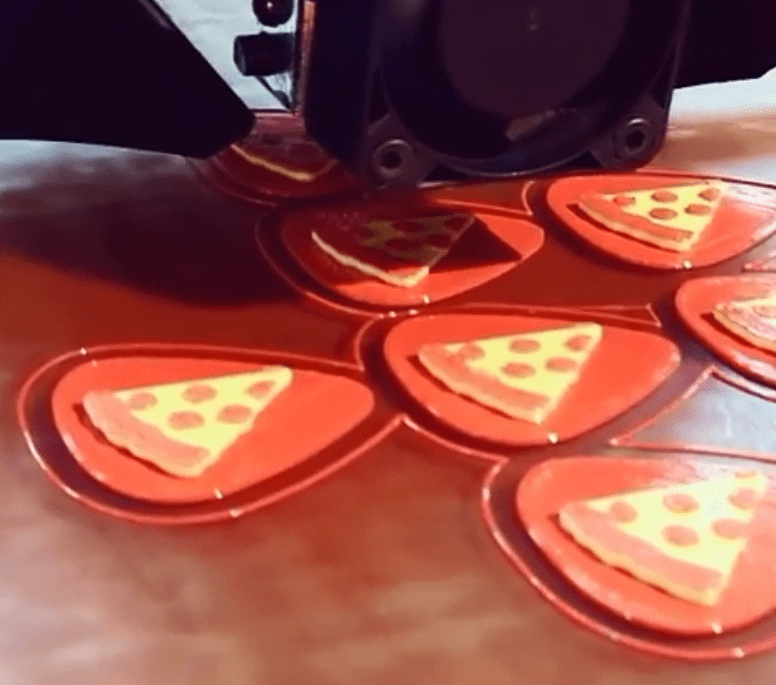
These methods refer to the way that kids hit the strings above the soundhole. I personally am much more comfortable using my thumb to strum, but most kids choose the pick when they are starting out. I 3D print some picks, and everyone gets to keep one after the workshop ends.
Strumming Patterns
Next we discuss strumming patterns. I demonstrate the difference between a simple pattern (up down up down) and a more interesting pattern (up down up up down) with a more complex rhythm. I ask kids which strumming pattern they think sounds better. I ask which strumming pattern they are more likely to hear in a song on the radio. Everyone answers the more interesting pattern. Then we briefly discuss how to make a pattern more interesting – changing the speed of strumming and changing the up/down direction of the strum.
Kids have 2 minutes to experiment with different strumming patterns, and then we go around the circle and each demonstrate a short strumming pattern.
Up until this point, we have been playing with open strings (aka no fingers pressing on the strings to alter the chords). Next up we learn about chords.
How to read a chord chart

Next up is the most difficult information to teach. How to read a chord chart so that you can learn where to put your fingers to play different chords. I tell kids that learning a chord chart is like getting the key to unlock the skill of playing a ukulele.
I ask kids how many vertical lines there are on each chart. Four. Then I ask what they think the vertical lines represent. There’s always at least one kid who knows the correct answer: the 4 strings.
I ask kids to look at the chart titled “C.” I ask them to point to the part of the instrument that they think the chart depicts. It is the top portion of the ukulele neck. The top four frets.
Next I ask what they think the dots represent. Many different answers for this one, but eventually someone guesses “Where your fingers go.” Then I test them. “How many fingers are used to play the C chord? The F chord? The G chord?” We practice placing our fingers for each one. We strum at the same time, and play each chord in unison.
A helpful tip for new players: Make sure you are only touching the strings needed for the chord. If you press another string by accident, it will alter the sound of the chord, because that string will be playing the wrong note.
Identifying the difference between major and minor chords by ear
I ask the group if they’d like to play a game. Yes! They do want to play a game! It’s called the Major and Minor Game. I demonstrate a major chord and ask them how it makes them feel. I demonstrate a minor chord and ask the same thing. We discuss how most popular songs are mainly made up of major chords, but with one or two minor chords in there to make it sound more interesting.
For the game, we identify chords as major or minor. I play a chord, and a kid guesses major or minor. We go around the circle taking turns. If a kid does not want to be put on the spot, that’s okay! I encourage everyone to play along in their heads. Kids love this part of the class, and usually ask if we can play it again at the end.
How to play a chord
Now that we’ve heard many chords played, and learned how to read a chord chart, we get some time to practice. I encourage kids to find a comfy spot in the room and spread out. They have 5 – 10 minutes to practice and get one-on-one help if needed. When we all come back together, everyone is encouraged to demonstrate a new chord they learned off of the chord page.
How to combine strumming and playing a chord
IF there is time (which there almost never is) and IF most of the kids have mastered two chords, we will have a practice session for switching between 2 chords. I recommend C and Am, since they both only need one finger, but are different enough that it’s still challenging. Ask kids to play a C chord, and play an interesting strumming pattern. Then have them continue the strumming pattern as they lift their finger from the C position, and change it to the Am. At first it will be a bit slow, but as they practice it will become faster and faster, and eventually seamless.
I then send kids home with a 3d printed pick, the ukulele chord chart page, a print out of a popular song and the chords (You Are My Sunshine is a good one), and the option to check out ukulele books.
Other ideas
I think it would be super cool to 3D print a working ukulele, and incorporate a little bit of technology talk into the lesson. I would also love to have a handout with instructions for how to design your own ukulele pick using tinkercad, and let kids email and print their design.
When I let kids in at the beginning of the workshop, I have a playlist of amazing ukulele players on the big screen.
Phew! That was a lot of information! If you have any active learning games or resources that help teach kids ukulele, let me know in the comments.

Thank you for this! I got a uke for xmas to (at the VERY least) use at storytimes, but I haven’t the foggiest on how to play it yet. Ideally, I’ll be able to attempt a program like this in the future, and this actually helps lay that groundwork!
[…] My fellow Canadian all-star blogger Karissa shared her program details on how to teach kids to play the ukulele. […]
Hi Karissa, thank you for sharing your ideas. I like how you get the children to hear major and minor chords and the feelings they generate. I think I will also add 7th chords, as the children will be able to hear that the chord wants to lead somewhere.
I’ve found that teaching children C and F in the first lesson, with a downward stroke of the strings with the first finger on each 4:4 beat, allows them to play a song very quickly into the first lesson. Something like “The wheels on the bus” with F and C or “Animal Fair” with just C all the way through. They then feel very excited that they can play after only one lesson. I avoid using a pick or thumb for reasons of avoiding habits that might be hard to break when they want to go onto more difficult skills later on, such as triple strums, fan and split stokes. Also, picks are not good for the nylon strings as they can cause wear very quickly.
I also use wooden blocks (like small building blocks) to teach them how to beat in time. Each child starts with a block and passes it on anti-clockwise to a beat. So Beat 1 – pick up left, Beat 2 – pass right, Beat 3 – pick up left, Beat 4 – pass right. For 3:4 rhythm they tap once on Beat 2 before passing right on beat 3. The objective is that they practise listening to the leader, so that they are all playing in sync together, like in an orchestra. They find this great fun, and so do the adult beginner classes too!
One difficulty I had to overcome was teaching left-handed learners. I have a ukulele set up for left-handers to try and I’ve had to create a set of left-handed chord charts too.
Kind regards
Paul
Hi Paul! Wow, thank you so much for sharing your tips. Wooden blocks are a great idea.
[…] How to Teach Kids the Basics of Ukulele Playing […]